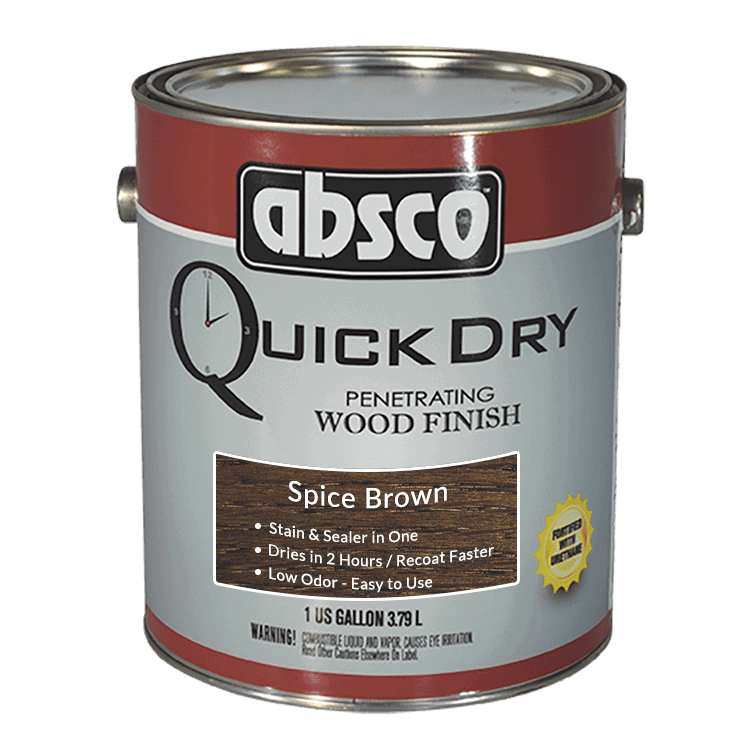
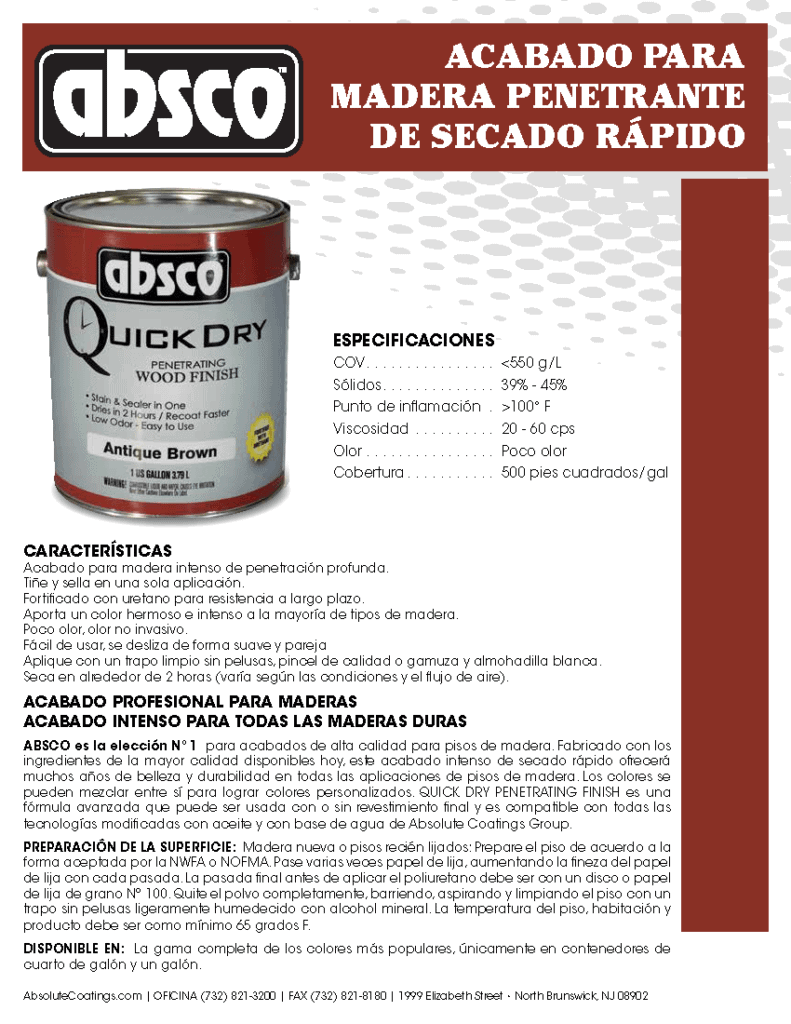
ABSCO SPICE BROWN QUICK PENETRATING WOOD FINISH
- Liquid Oil Based Wood Penetrating Stains made from the highest-quality oils, resins and pigments to ensure your finishing project will be an easy and rewarding experience.
- These wipe-on stains are designed to be applied over raw wood surfaces. to be applied over raw wood surfaces.
Description
- Prepare the floor according to NWFA best practices. Finish the sanding process with a 100# grit screen, then vacuum and tack to remove dust.
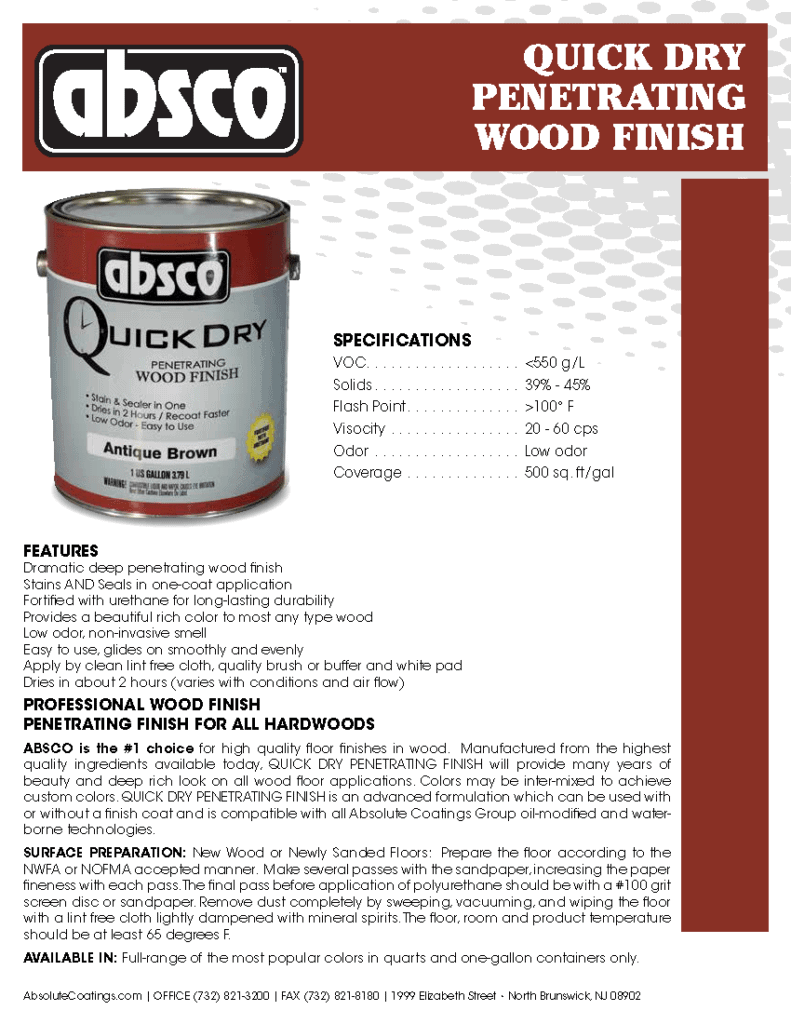
- Can be applied with either clean lint free cloth, 3/8” nap mohair (lint-free) roller cover, a good quality brush or buffer and white pad.
- Recommended drying and recoat times of 203 hours are based upon optimal condition of 77 degrees and 50% RH and good air circulation. Conditions other than these will extend drying and recoat times. Some wood filler will not accept this stain, test before application.
- Stir the stain thoroughly with a flat paddle to ensure an even color. Stir occasionally during use.
- Brush on stain or wipe on with a clean cloth in the direction of the wood grain. Don’t let excess stain “puddle”. Allow stain to penetrate in to the wood for 2-5 minutes.
- With a clean lint free clith, remove excess stain, wiping with the grain of the wood. Remove excess stain well to assure top-coat adhesion.
- Dispose of application rags, rollers and stain-soaked items in a sealed pail of water and dispose accordingly to local regulations. Rags and other waste soaked with this product may spontaneoulsly catch fire if not properly discarded.
- For long lasting protection and to further beautify wood surfaces, use any Absco Oil-Based or Water-Based Top Coat Finish.
All coatings emit vapors as they dry. Primarily, these vapors are evaporated solvents and their odors vary from mild to strong. One common misconception is that strong smelling solvents must be bad while solvents that do not have strong odors must be safe. Regardless of how much the vapors smell, the most comfortable and healthiest environment for the homeowner is achieved by aggressively expelling the vapors from the house. The homeowner will appreciate your concern for their comfort and well-being.
While leaving the house closed-up and turning on the furnace or air conditioning will actively churn the air and quickly dilute the vapors throughout the house, it will not eliminate the vapors. Although it is quite possible that the vapors may be dispersed so evenly by this method that their smell will diminish to the limits of detection, the vapors will still be present. The best way to assure indoor air quality is by employing the following recommendations.
There is only one way to eliminate vapors effectively, expel them from the house. This is achieved by exchanging the indoor air with clean outdoor air. Once a floor has dried to the touch, most of the solvents have been emitted.
At this point, opening windows and doors is a good start. Using them in conjunction with the furnace (see cautions later in this article), ventilation or air conditioning systems helps immensely. Adding portable fans to the mix and turning on bathroom and kitchen exhaust fans will really stir the air and help.
If outdoor air is actively being introduced to the house and there are no air spaces in the house where air is stagnant, such as closets, fumes will be eliminated after an enough air exchange. How many is impossible to determine because of a multitude of factors that vary for every house and environment.
One common misconception is that strong smelling solvents must be bad while solvents that do not have strong odors must be safe.
A house contains a fixed number of cubic feet of volume. If an equal volume (one air exchange) is brought in from outdoors, it will mix with the indoor air. For every volume of air entering the house, an equal amount must leave the house. The clean air mixes freely with the odor-filled air. There is no easy way to predict how much they will mix because so much depends on the way the air moves through the complex space comprising a typical house. How “tight” the house is and what “assist” is provided by mechanical air moving systems in the house (furnace, etc.) will greatly influence air exchange rates.
Additionally, external factors such as wind blowing around the house and differences in temperature or even small differences in air pressure between the inside and the outside of the house can have a large impact on air exchange rates as well. All these factors can be exploited to move air effectively and eliminate vapors. Each air exchange, each cycle, expels more of the vapors until at some point there are essentially no vapors or odors left to expel.
Another contributing factor influencing required air exchanges to clear the air is the amount of floor space being coated relative to the total square footage of the house. A two hundred square foot coating job in a two thousand square foot house will require considerably fewer air exchanges to clear the air than would a floor-coating job covering every square foot of the house.
There is no doubt these goals are easier to achieve during warm seasons of the year. Obviously, cracking windows open, taking advantage of summer breezes, even setting up fans is generally no problem at those times. The dilemmas seem to appear primarily during the winter months when the need to ventilate and bring in outside air is directly at odds with the goal of maintaining acceptable levels of heat and not waste energy. The temptation is strong to leave the house closed tight, run the furnace enough to maintain a moderate temperature, and wish the fumes away. Although this approach might work OK in older, less energy efficient homes, because the “leakage” is high enough to achieve some acceptable air exchange rates, it will not work with new energy-efficient construction.
Simply cracking open a window and opening an internal door can raise the rate of air exchange to approximately two per hour if another “exit” air path (cracked-open window) is provided as well. The temptation is strong to leave the house closed tight, run the furnace enough to maintain a moderate temperature, and wish the fumes away.
Contractors may consider reviewing their practices regarding ventilation requirements today as opposed to how they have dealt with these matters in the past. Houses today are built much tighter than in years past. A contractor who in the past never had to bother with ventilation after completing the final coat should be aware that the natural “leakiness” of older construction practices and standards pretty much assured good natural air exchange rates. That is not true today. Modern homes can easily attain a natural air exchange flow that is only a quarter of what older houses had. This means business as usual does not apply to the contractor’s responsibilities regarding ventilation. He must do more today than he did in the past to assure the homeowner occupies a space that is comfortable and safe to occupy.
NIOSH has done extensive studies to determine Indoor Air Quality standards and recommendations for air exchange rates that result in comfortable and healthy living environments. For example, they recommend that during the heating season, a house should have air exchange rates of at least three per hour. However, it is quite possible with today’s energy efficient construction methods to achieve conditions as low as one-half of an air exchange per hour. On the other hand, the same room in an older, less energy-efficient house can easily have an air exchange rate of about two per hour even with the windows and doors closed. Obviously, though the older house has an energy disadvantage of “leaking in” cold air from outdoors, it has a health advantage of providing acceptable air exchange rates. This also allows the vapors to dissipate at a much higher rate. Likewise, bacteria, mold and other undesirable things have a tougher time staking a claim in this “breathing” environment.
Simply cracking open a window and opening an internal door for the “tight” construction example above can raise the rate of air exchange to approximately two per hour if another “exit” air path (cracked-open window) is provided as well. Adding a box fan in the window can bump the rate of air exchange to over 5 per hour. Although it is impossible to know how many air exchanges are required for a specific house to eliminate all the vapors, it is obvious that high rates of air exchange over a period of a couple of days has the potential to exchange outdoor air with indoor air hundreds of times. Unfortunately, sometimes a choice must be made during this brief ventilating period between saving energy or restoring indoor air quality.
Sometimes the contractor can minimize the potential for lingering fumes, particularly in the winter, by making sure he is optimizing the coating process. It is vital that he follow the manufacturer’s recommendations carefully. Allow stains to dry completely before coating. If a stain is not completely dry, it will slow down the cure time of subsequent coats, or worse – wrinkling or mottling could occur. All coatings should be applied at their recommended coverage rates and no heavier. Heavy coats take longer to dry, cure and expel all their solvents. Consequently, they will emit odors longer. Avoid coating at low temperatures. Coating at lower than recommended temperatures will extend the drying and curing times. (Safety tip: Depending on the type of coating used, it may necessary to heat up the house, then shut off the heat and any sources of ignition prior to coating).
The use of portable fans and turning on kitchen and bathroom exhaust fans is very effective as well, if they are not used before the final coat is dry to the touch. All coatings should be applied at their recommended coverage rates and no heavier. Heavy coats take longer to dry, cure and expel all their solvents.
In winter the contractor would do well to educate the homeowner about the need for good ventilation during the first few days after the final coat is applied. He or She should alert the customer that there would be some heat energy loss in order to achieve the necessary ventilation.
This can be a real dilemma for some people. Find out before you start the job if there is going to be an issue. It seems that there is a wide range of tolerance among consumers regarding the “comfort levels” they expect. Many homeowners consider residual vapors as a minor inconvenience and see no need to make a fuss about it. At the other extreme are small groups of people with various degrees of chemical sensitivities that are much more sensitive to residual vapors.
Frequently, in those cases, most people cannot even detect an odor that the “sensitive” person finds unacceptable. For these reasons, it is a good idea to find out how they feel about wasting some heat energy for a couple of days in order to achieve excellent ventilation. Also ask them if they are chemically sensitive or if they are OK with temporarily living with some residual vapors for a few days. If they are very chemically sensitive or they object to wasting any heat energy, they may be better off waiting until a warmer season to have this work done. Even people with chemical sensitivities should be able to enjoy hardwood floors so long as the coatings are applied properly, the curing conditions are suitable, aggressive ventilation is achieved and a sufficient time (determined by temperature and number of air exchanges) has elapsed before the homeowner returns and reoccupies the home.
Each contractor will develop methods that work best for him and his customers. For winter jobs, the key points are to maintain temperatures during the job according to the product application instructions. Ventilate, if possible, between coats once the coating is dry to the touch. Once the final coat has dried to the touch, crack open some windows just a little. Then, depending on the type of product used, when the fumes have subsided sufficiently to not present a fire hazard, set the furnace thermostat to about 70 degrees. Check back in a while to see what temperature the furnace is maintaining. As the coating dries, the windows can be opened a little more. The idea is to have an enough inflow of outside air to challenge the ability of the furnace to keep up without allowing the temperature to fall too much. Remember that the cold air will fall to the floor level so be careful to limit introducing really cold air. The goal is to introduce fresh air without harming the coating. It is important to emphasize at this point the need to be very cautious regarding fire hazard when using the furnace after using solvent-borne coatings. Initial ventilation should not utilize the furnace. Initial air exchanges must be achieved by opening windows and doors to evacuate fumes.
Once the fumes have subsided, exhaust fans and/ or portable fans may also be employed. The furnace’s blower, acting as a fan (no heat) can often be utilized at this early phase of ventilating as long as the switch position on the thermostat has positions for “Fan Only”, the thermostat temperature selector has an “Off” range, and the pilot light has been extinguished.
Ideally, introducing outside air should tax the furnace enough to keep it running nearly continuously, but not so much that the house temperature cannot be maintained above 60 degrees. Adjust this by increasing or decreasing the window openings, if the coating has cured sufficiently to handle the cold air at floor level. The reason for this is furnaces have powerful and efficient blowers coupled with efficient distribution ducting. Make good use of these assets. The blowers typically can move up to six hundred cubic feet per minute, fifteen to twenty percent of which is fresh outdoor air (assuming the furnace was installed properly). The ductwork distributes this air all over the house to flush out vapors. Each cubic foot of air moved carries away a portion of the vapors. It’s like an invasion of clean air and, in the end, the clean air always wins. The use of portable fans and turning on kitchen and bathroom exhaust fans is very effective as well, if they are not used before the final coat is dry to the touch. Avoid using box fans in windows in cold weather.
Especially today, more than ever, it is important for the skilled craftsman to provide top-notch services that single their company out as the one that cares. Successful companies these days share in a common ideology that the customer is number one. What seems to get lost however, is the understanding that the products used in our industry have certain needs. Because we are dealing with chemicals and processes, specific practices must be maintained to achieve total satisfaction. These steps go far further than merely successfully applying a floor finish. The care before, during, and after makes all the difference in the world and will result in a much happier customer and healthier bottom line. As a former floor contractor, I concur with the message in our feature article, Breathing Easy, that it is imperative contractors try to ventilate appropriately or at least advise the homeowner regarding proper steps to clear the home’s air of vapors. By doing so you will be perceived as a quality craftsman and expert in your field.
Fans aimed into closets and into any place there is not much natural airflow is certainly recommended. In a room, it is best to use articulating fans and set them so that at one limit they aim at a corner, then sweep to the adjacent corner. If only a few fans are available, the best utilization is to place them in doorways blowing into a hallway. The “draw” of the fan will pull fumes evenly from all parts of the room. This will result in complete mixing of room air with no stagnant areas in warmer seasons, it is equally important to achieve good rates of air exchange. Fans in rooms and box fans, particularly mounted in windows, can be very effective. The best way to take advantage of summer breezes to maximize air exchange may be to note the wind direction, then open the windows wide on the upwind and downwind sides of the house. Leave the side windows closed (using fans in these rooms). This way you not only take full advantage of the wind blowing into one side of the house, but the passage of the wind around the house will cause the air to speed up resulting in a slight drop in pressure on the downwind side of the house. This causes an area of low pressure (partial vacuum) immediately downwind of the house. So, in addition to the wind being blown through the house, air is also being sucked through the house. The combined effect can result in a very respectable air exchange rate even when the wind is light.
Back when houses were built without a large emphasis on energy efficiency, little was known about indoor air quality. It generally wasn’t a problem. The birth of the science of indoor air quality was the result of some hard lessons learned from the consequences of building structures very “tight” to gain energy efficiency but not providing adequate ventilation.
In 1981, a state building was completed called the Bateman building. At the time it was heralded as a model of energy efficiency. However, within a year of its opening it was unoccupied. Eighty percent of the occupants of one floor, for example, suffered from symptoms that were attributed to the building environment. It was ultimately concluded that poor ventilation was at fault.
Since that time, in 446 episodes of “tight building syndrome” investigated by NIOSH, 52% were attributed to inadequate ventilation. Other minor contributors were air contamination from inside the building, air contamination from outside the building, microbiological contamination, and unknown causes. It can be argued that the contribution of inadequate ventilation is, in fact, understated in these conclusions because if better ventilation had existed the other factors would have contributed even less.
Undoubtedly, clean air is important to comfort and health. It is also relatively easy to achieve. It requires little effort to crack open some windows. It requires only a small additional effort to set up some fans. A few minutes of coaching a homeowner on how to make good use of their furnace and other systems to expel the fumes at an optimum rate is time well spent and will assure the homeowner you want them to be comfortable and healthy. Aggressive ventilation is key.
Assuming the product has been applied correctly, optimizing air exchange rates should eliminate fumes and odors within a few days. Following these guidelines, a rule of thumb is if no odors remain the fumes are gone, and the aggressive ventilating regimen can be stopped. Indoor air quality is defined as the quality of air within a living space that promotes comfort and health. Striving for that goal should give all of us a lot of comfort
The Problem
I got a call about a floor with finish that showed a definite milky cast—sometimes described as a hazy look—in the overall appearance of the floor. In addition, there were differences in luster throughout the floor.
The Procedure
The 2¼-inch red oak floor was installed and sanded. A catalyzed water-based finish in a satin sheen was applied. The first two coats were applied and dried normally. They were clear and even in appearance.
When the final coat was applied, the floor was normal looking. A day later, the contractor received a complaint that the floor was hazy looking. When he went back and looked at the floor, there was a definite white, hazy cast to the floor, and he noticed the floor had an uneven luster.
The Cause
In discussing the finishing process with the contractor, it was discovered that on the day the final coat was applied, it was raining outside, so the contractor couldn’t open any of the windows. The humidity was high, and the air was cool, although the house had heat and the floors were not cold. By not opening windows or adding ventilation, the moisture from the water-based finish was trapped in the house. The finish could not dry properly, as the drying process of the co-solvent and water in the finish were slowed down dramatically.
Additionally, the extra trapped water hydrolyzed the catalyst in the coating, preventing it from curing the finish.
In cases like this, not only is the film hazy, it also is usually soft enough to put a fingernail into the surface. Trapping the water and co-solvent would also keep the film wet longer, allowing it to soak in differently in different places on the floor. This would account for the uneven luster when the finish dried.
How to Fix the Floor?
If this is truly only in the final coat, a good screening to open the surface and allow the trapped solvent and water to come out for 24 hours before applying finish will help clear the film. Then, a good wet coat of finish should be applied, allowing the proper drying conditions and ventilation.
Remember that with satin finishes, the heavier the coat, the shinier the finish, and the thinner the coat, the duller the finish. So, apply the finish very evenly and with a uniform wet film thickness, and make sure there is good ventilation for drying.
If the haze is in more than one coat, the contractor must start over by sanding off the finish. Screening deep enough to take out more than one coat is possible but is not an efficient use of time. Also, screening that deep is hard to do without leaving severe scratches that would have to be removed by starting over anyway. So, it’s best to bite the bullet, dig out the drum, and start sanding.
In the Future
On those cold wet days when the windows cannot be opened for proper ventilation, there are two ways of preventing this condition from happening (sometimes both may be necessary):
1) Set some 20-inch box fans around the house on timers set to turn on slow speed a half hour after you leave. This circulates air throughout the house and helps pick up moisture everywhere in the building.
2) Relative humidity is just that—relative to the temperature. Turning the heat up to 90°F would allow the air to pick up more water, since the warmer the air, the more water it will hold.
Cleanup
Clean up application materials and hands with mineral spirits or quality waterless hand cleaner.
Disposal
Take great care when disposing of product-soaked applicators. Dispose of application rags, rollers and stain-soaked items in a sealed pail of water and dispose accordingly to local regulations. Rags and other waste soaked with this product may spontaneously catch fire if not properly discarded. Immediately place all application materials soaked with this product in a sealed, water-filled metal container. Dispose of in accordance with local fire regulations.
Spills
Clean up spills with mineral spirits immediately while wet. If oil-based finishes dry, they are difficult to clean off any surface, clothes or carpet. Carpet may discolor if cleaned with mineral spirits.
Prevention
Protect your hands with gloves, and your clothes with an apron.
Please be mindful of the manner in which oil-based products are stored and how long they have been in storage. They not a forever product.
Life of Product
Absco products do not last forever, even when unopened. They are best used within 1 year of the manufacture date listed on the bottom of the can. The life of the product may be extended with proper care and storage.
Oil-based products start to harden and cure when exposed to oxygen. The following best practices will increase the life of your product:
- Keep container tightly closed and sealed until ready for use, in the original container. Do not store in unlabeled containers.
- Pry open sealed lids with a paint can opener by hooking under the lid’s rolled edge. The use of a screwdriver can disfigure the rim and lid, impairing a complete seal.
- Keep lid closed while working. Decant what you will use into a bowl, paper cup, or plate, and close can lid as you work. Every minute the can is open, the product is curing.
- Containers that have been opened must be carefully resealed and kept upright to prevent leakage. Clean the chime of the can thoroughly with a paper towel before closing to create a complete seal. Avoid wiping used brushes on the lid.
- Pound the lid in place using a rubber mallet to avoid distorting the chime or lid. Dents in the lid from direct contact with a hammer can impair a complete seal. Alternatively, place a flat piece of wood over can lid and firmly pound shut.
- Avoid temperatures below 50°F/10°C or above 80°F/26°C. Frozen and heat-damaged product cannot be revitalized. Store in original container protected from direct sunlight in a dry, cool and well-ventilated areas.
- Do not store product in an attic, garage, in direct sunlight, or next to ignition source with heat and flames such as a furnace.
- Store the can upside down to create a liquid seal, minimizing oxygen exposure from within the can. Decant remaining product from the can before stirring.
- Decant leftovers to a smaller, properly labeled container when the finish is almost used up to reduce the volume of oxygen in the container.
- Use appropriate containment to avoid environmental contamination.
- Wood Stain Warnings and Warranties
FIRST AID:
- Seek immediate medical attention if symptoms occur due to the following. EYE CONTACT: Remove any contact lenses. Flush eyes with water for 20+ minutes while lifting upper and lower eyelids. SKIN CONTACT: Wash thoroughly after handling. INHALATION: Move to fresh air and loosen clothing. If not breathing, if breathing is irregular or if respiratory arrest occurs, provide artificial respiration or oxygen by trained personnel. INGESTION: Call physician immediately. Wash out mouth with water. Do not induce vomiting unless directed to do so by medical personnel. Never give anything by mouth to an unconscious person.
WARNING:
- If you scrape, sand or remove old paint, you may release lead dust. LEAD
IS TOXIC. EXPOSURE OT LEAD DUST CAN CAUSE SERIOUS ILLNESS, SUCH AS
BRAIN DAMAGE, ESPECIALLY IN CHILDREN, PREGNANT WOMEN, SHOULD ALSO AVOID
EXPOSURE. Wear a NOISH-approved respirator to control lead exposure.
Clean up carefully with a HEPA vacuum and a wet mop. Before you start,
find out how to protect yourself and your family by contacting the
National Lead Information Hotline at 1.800.424.LEAD or epa.gov/lead. -
Contains mineral spirits – Combustible. Do not store or use near heat, sparks, flame or other ignition sources. Harmful or fatal if swallow, skin irritant, avoid contact with skin and eyes. Wear rubber gloves and safety goggles when handling. To avoid fresh air entry during application or drying. If you experience eye watering, headaches or dizziness, increase fresh air or wear respiratory protection (NIOSH/MS HA TC23C or equivalent) or leave the area. Close container after each use. Do not smoke during application and until all vapors (odors) are gone. To avoid spontaneous combustion during temporary storage, soak soiled rags and waste immediately after use in a water-filled closed metal container.
Prop 65 WARNING:
- WARNING: This product can expose you to Ethylene oxide, which is known to the State of California to cause cancer and birth defects or other reproductive harm. This product can expose you to chemicals including Hydrazine, 1,4-Dioxane, Propylene oxide, which are known to the State of California to cause cancer, and Ethanediol, which is known to the State of California to cause birth defects or other reproductive harm. For more information go to www.P65Warnings.ca.gov.
Absolute Coating products must be tested to your complete satisfaction before using. Absolute Coating nor Unique Wood Products will not be responsible for color satisfaction, misapplication, nor compatibility with other manufacturer’s products.
General Finishes
safety data sheet
General Finishes technical data sheet
Additional information
| Stain Sizes | 1/2 Pint, Pint, Quart |
|---|

